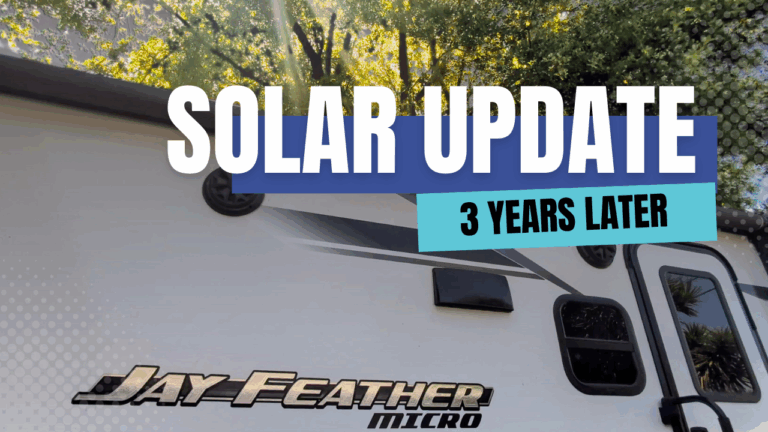
For the last three years our family has owned a Jayco Jay Feather Micro 171BH travel trailer. And for the last two years we’ve created videos going over all the issues that we’ve had in the trailer the previous year. Our one year and two year review videos are still available if you’d like to check them out.
Well, now it is our third year of owning this trailer and we didn’t have anything worth reporting in this third year of ownership. Luckily, all of our issues seem to have wiggled their way out in the first two years. And we’re very happy to report that we really didn’t have anything major happen this last year. But I still wanted to check in, so I thought I’d go over some of the main reasons why we purchased this trailer originally and then how we feel about those items now that we’ve owned the trailer for three years. Then at the end, we’ll list some of my favorite upgrades that we’ve done in this trailer.
Okay, let’s start going over some of the reasons why we purchased this trailer to begin with and how we feel about that three years later.
Rogina Roaming is supported by its audience. When you purchase through links on our site, we may earn an affiliate commission at no extra cost to you.
Length
First is the length. It was important to us to have a trailer under 24 feet and this trailer being just over 20 feet met that requirement. And three years later, I will tell you that this is still really important to us. We definitely would still never get a trailer over 24 feet.
We have loved having the trailer the length that it is. And there’s a couple of reasons for this. The main reason is the fact that we like to camp at state parks. We’re in California, so primarily we’re in California State Parks, and they all do have different restrictions, but the one we see most often is that the trailer needs to be under 24 feet.
We have been able to squeeze this trailer into some sites that we love. Sometimes the sites honestly feel like they’d be better off for tent campers, but we’re always happy when we can squeeze our trailer into a site that’s so filled with trees that we know you could not get in a rig that’s much larger than what we have.
The other nice thing about it being this length is it’s small enough that we could park it in our driveway, and that was important to us as well.
So we are very happy with the length of our trailer. We haven’t had to skip out on any campgrounds that we were interested in because of the size of our rig and being able to take our trailer into small campgrounds filled with nature is definitely one of our favorite parts about this trailer.
Floor Plan
The next item that was important to us when we were buying this trailer was the floor plan. It was important to us that there were private spaces for our kids. We wanted them to have their own bunks. We wanted the bunks to each have a window. We wanted them to have USB chargers and outlets. We wanted it to be a comfortable area for the kids.
We also wanted them to have curtains. We wanted them to be able to close their curtains and have a little bit of private space when it’s time to go to bed. The curtains both in the bunks and upfront act as a really good separation of space in such a small area.
So this floor plan has worked out perfect for us. We’re very happy with it. We use the dinette all the time. It’s great having a front bed here that we don’t have to fold down. It’s just here all the time. And then of course, the bunks have worked out great for us as well. So after three years, we are still very happy with this floor plan.
Bathroom
The next important item when we were purchasing this trailer was the bathroom, or more specifically the bathroom sink. It is amazingly hard to find a trailer this size with a sink in the bathroom. And this was important to us. With kids it just seems like a sink in the bathroom is extra important not only for washing your hands, but also just to have that spot to brush your teeth. It just makes it that much easier for the kids to stay on routine while we’re at camp.
And three years later, I still love this bathroom layout. It has everything we need. We have a sink, we have some counter space, we have a vanity. We did find that we really didn’t use our shower, so we ended up converting that into a closet, and that has worked out amazing for us as well.
Dry Camping
The next thing that we liked about this trailer was that it was prepped for dry camping. So that was another thing that was pretty important to us.
One of the dry camping items that we were looking at is it has the two propane tanks. We liked that there was a spare propane tank on there.
It also had the gas electric fridge. The gas electric fridge was important to us because we wanted to be able to use the fridge on propane while we were dry camping. When we first got the trailer, we didn’t have the solar upgrade that we have now and the lithium batteries that we have now. With the original batteries that we had on the trailer, the draw from the 12 volt fridge would’ve been a lot more than it would be now.
And then this trailer did also have solar. At the time the standard option was only solar prep. We upgraded and we got the optional solar package which included a 190 watt solar panel and a PWM solar controller. Now the solar package does come standard with these trailers.
And then the last dry camping feature that made us excited about this trailer was it was prepped for an inverter. However, now that we have an inverter, we found out that that inverter prep wasn’t actually that useful. It’s not designed to control the entire trailer, and we ended up not using it and went a totally separate route. And we’ll talk more about our solar upgrades later when we discuss our favorite upgrades.
Outdoor Kitchen
The next item that was really important for us when we were purchasing this trailer was an outside kitchen.
Now, the outside kitchen that this has, we were not really excited about when we purchased it, but we liked everything else about this and we thought what it had was better than nothing. So we went with it.
The trailer has what’s called a “Jay Port” where you can slide in a shelf to the side of the trailer and then on top of that shelf a Blackstone can sit on it. Our trailer came with a 17 inch Blackstone. That tray has holes for the 17 or you can upgrade to the 22. We now have a 22 inch Blackstone sitting on that same shelf that goes right on the side of our trailer.
I really love this system. We cook almost everything at camp on our Blackstone, and it has worked out really well for us. I was happy with the 17 inch, but the 22 inch is a game changer. It is so much better for our family of four, and I’m very, very happy with this experience.
So honestly, this outdoor kitchen has worked out way better for us than I would have predicted when we bought this three years ago. I don’t have any complaints. It does take a second to put everything together, but it’s not that big of a deal, and we’re very happy with the cooking experience.
Backup Camera
The next item that was important to us when we were buying the trailer was that it was prepped for a backup camera. This trailer not only was prepped for a backup camera, but also for two side cameras, which I was really excited about. Being new to owning a travel trailer, it seemed like the more cameras the better.
The backup camera was easy to install, it was plug and play. The two side cameras were not really prepped. It wasn’t really any easier to put it on our two sides than it would be on a trailer that wasn’t prepped.
Three years later, my opinion on the camera system has shifted a bit. I still think the backup camera is nice and we use that often, but the two side cameras don’t seem necessary. We use our tow mirrors a lot more often than we use the side cameras. The problem with the side cameras is it’s hard to orient yourself with where those are looking. It feels more natural to just look at your tow mirrors. And when you have all three cameras up, the screens for each are smaller than if you just have the one backup camera.
So if we were to purchase those today, I think we would consider only buying the backup camera and not spend the extra on the sides. I mean, it’s cool that we have the side cameras. They’re just not really necessary.
Enclosed Underbelly
The next thing we really liked about this trailer when we bought it was the enclosed underbelly. We were really excited about that because we thought that could allow us to do some cold weather camping. Now, we have not done anything extreme with this trailer. We have not taken it to the snow.
The coldest that we have camped in is overnight it probably got to the low thirties, and we had no issues. It wasn’t cold in here. We didn’t have any issues with pipes or tanks. And I think because we have the enclosed underbelly, that’s just not something that we’re concerned about. And that feels nice.
The one downside is the enclosed underbelly does make it harder to work on the trailer sometimes and to do upgrades. So twice now we have taken the underbelly off, once to upgrade our solar system, and then another time when we wanted to check on the freshwater tank and secure that a little bit.
And it’s not that big of a deal, but it does definitely add some time and work to projects that involve the underneath of the trailer when you have to take the underbelly off. I definitely would still rather have an enclosed underbelly than not. It’s just something that we hadn’t really given a lot of thought before we purchased it.
And now some trailers have panels that you could take off. I don’t know how much weight or cost that adds to the trailer, but that does seem like a feature worth looking into so you don’t have to remove the entire underbelly to work on a project. Instead you would just remove the necessary section.
Low Maintenance
And the last thing that we liked about this trailer when we purchased it was it seemed to have easy maintenance. We liked that it had a black tank flush, which surprisingly not every trailer we looked at had that. We also liked that it had double Azdel walls, so it has Azdel on the outside and the inside. And we also liked that it didn’t have a slide because that was one less thing to maintain.
And now that we’ve had the trailer for three years, we’re still really happy with that stuff. We feel like this is a really low maintenance trailer, and we like that it gives us more time to camp and less time to deal with issues in the trailer.
3-Year Conclusions
So overall, we are still really happy with this trailer three years later, and we still love this trailer. Everyone in our family is always still excited to go on a camping trip and get to spend some time out in the trailer.
Favorite Upgrades
Now I’m going to go over our favorite upgrades that we’ve done the trailer in the last three years. These are listed in no particular order.
Entry Window
The first is the entry window. We replaced the frosted glass window in our front entry door with one that we can see through.
And honestly, this took us longer to do than it probably should have because I thought it would be really annoying to have the shade for the window in between the screen door and the front entry door. So because the window’s on the entry door, that means you have to open up your doors and go between the screen and the regular door to pull up and close the window.
It turns out it’s not that big of a deal. You really only open it in the morning and then close it in the evening, and being able to have more visibility is definitely worth it. This entry window is one of my absolute favorite upgrades that we’ve done.
MaxxAir Vent Covers
The next is the MaxxAir vent covers. We added a cover to both the fan in the front of the trailer and also the one in the bathroom. The one in the front is designed for one of these covers. So it had clips, you just stick it in. It was a really quick thing. The other one was not designed for it, but still the installation didn’t take too long.
What the covers do is they allow us to have our vents open while we’re traveling, while the trailer’s going down the road and also in the rain. It lets us have the vents open whenever we want. And since we normally dry camp, we use those fans a lot. They are our main way to cool the trailer and circulate air, and it’s awesome to be able to have them open whenever and not have to worry about it.
Digital Thermostat
The next upgrade that I love is our digital thermostat.
The original thermostat that came with this trailer was really difficult to use. Just turning it on and off, I felt like I was going to break the little plastic switch off. It was really a struggle.
So adding a digital thermostat is awesome because not only is it super simple to use, but I really like being able to have a digital readout that tells me what the temperature is in the trailer right now. And it makes it really easy to see what you’re setting it to. And I think this is really nice, especially when you’re camping and it’s a little bit colder and you want your furnace on overnight. You don’t want the furnace turning on all the time (because it’s loud) or to get too hot, so it’s nice to have more control over your thermostat.
Blue Puck Lights
The next upgrade that I like are the blue puck lights over the dinette. This one kind of surprised me because we mostly changed this because one of them broke, but then it turns out what we upgraded to just makes so much more sense.
So we had an issue with one of our puck lights over the dinette. And we do go over that in the two-year review. Because of that, we decided to switch them out with puck lights that have a blue light option. So it still has the regular light, but also, you could dim the regular light or set up on a blue light.
And I use these blue lights all the time. Every time we’re camping, as soon as it gets dark, I come in and I turn both of those blue lights on. And what that does is it lets our kids come in and out, or even us, and you can see. The blue light gives just enough light that it’s not too dark, you can see where you’re going, but it’s not pulling bugs in with you.
So we could come in, everybody could see what’s going on, and then when the door’s closed, then we could turn on the big light. So I use these blue lights all the time, and I’m really a big fan.
USB Outlet
The next is the USB outlet. We added a USB outlet to the headboard on the front of our bed, and that is awesome.
There is a pop-up tower already on the headboard and that also has some USB ports. But, that whole tower is actually plugged into a standard household outlet. So none of that works without shore power.
The USBs that we added work on the 12 volt system. So those work while dry camping, the trailer does not have to be plugged in. It just works off of the battery. And even though we have an inverter, we still use these USBs more than anything because we don’t turn our inverter on unless we actually need it. It’s just really convenient to have a couple extra USBs right here in the front of the trailer.
Solar Upgrades
And then lastly, of course, I have to include that our favorite upgrade is what we have done to our solar system. So I call it the solar upgrade, but it’s actually a lot more than that.
We added a second solar panel, we added an inverter to our trailer, and we also upgraded to three 100 amp hour lithium batteries. So we have 300 amp hours of lithium batteries. We have an inverter that’s large enough to power anything in the trailer including the microwave. Technically, we haven’t used it on our air conditioner yet. We should be able to. We just still haven’t installed a soft start into our air conditioner yet. I think we might do that this summer.
But anyways, the inverter lets us use any of the outlets, any of the items that would require shore power we can use with the inverter. And our battery bank is large enough that even if we don’t get good solar coming in our solar panels, we still have enough battery power to last us for the weekend, no problem.
And because I’m a data nerd, my very favorite part about our solar upgrades is we added in a Cerbo GX and a Cerbo GX touch 70. So the touch 70 is just the screen that allows you to see what’s happening in the Cerbo GX and the Cerbo GX is basically the brains of the entire solar system. So it takes all the pieces and we plug it all in to the Cerbo GX. And then we have the screen that shows us everything that’s going on with our solar system.
It allows us to see how much sun we’re getting on the solar panels and where it’s going. So if it’s charging the batteries or if it’s helping power the DC system, or if the inverter is turned on and it’s powering the AC system. We can see exactly how much power we’re using, how much power we’re getting, and it’s really awesome to have a really clear idea of what’s going on with all of that.
If you want to see more about our solar upgrades and what cables we used and where we ran them, and just see all the details on exactly what we did, you can find our full solar upgrade here.
Summary
So that is it. After three years, we still love this trailer. We’re not having issues with it, and we’ve done some really fun upgrades that make it even more fun to camp with.


